|
|
Post by V8 Super Beetle on Dec 8, 2010 10:10:03 GMT -5
LOL, I'll get some burnout videos soon, but I definitely wasn't going to do one by my house cause I don't want to piss my cop neighbor off.
Thanks, Chris! I can't get over the fact that it came out as well as it did too. Granted, I put a lot of time into it, but color sanding, buffing and polishing made a BIG difference. Although my buddy said I made the job pretty easy for him. He pretty much just buffed out the dust and some areas that had dry spray.
|
|
|
|
Post by V8 Super Beetle on Dec 20, 2010 11:15:50 GMT -5
Time for an update. I coated the interior flooring and the under chassis with some Master Series. I installed my locking hood pins, my 2" solid aluminum lowering blocks and I finished the install of the one piece windows on both doors. All that's left, other than small item things, is to wire up the car (lights / signals only cause everything else is done) and install the carpet. Also, I took the car for a test drive last night cause I was curious as to how it sounds inside without a bunch of parts laying around the car and with all the windows in. All I could hear was the sound of the engine and the rumble of the exhaust. It was pretty sweet. Some pics of the undercoating. I forgot to take pics of the front and undercarriage.   Here are the 2" blocks from JTR.com. Solid aluminum blocks. Not that extruded hollow crap that could break. It's amazing how much difference a 2" drop made in the rear. The rear is still about 3/4" higher which is perfect, to me.  The hardware is heavy duty too. Notice how tall the nuts are.  Some pics of the rear with the blocks. Made a big difference IMO.   And the one piece windows installed. Doors fully done. The one piece windows are kinda a PITA. I like the look, but I'm not sure I like how they function all that much because they want to pull the rubber inside the door when I roll them down. I hit them with a little WD-40 temporarily, but I'll have to figure something else out so my windows aren't always greasy when I roll them down. I had some trouble installing them. The guy that sold me my new regulators said I needed 65-67 regulators for the one piece kit. Nope! Well, they wouldn't work cause the glass would hit the regulator on it's way down keeping it from rolling down at all. So I had to reuse the old ones and I modified the window scraper for the one piece windows. Works pretty good now. The new dual roller regulator I wish would've worked. The window crank mechanism was too long.   Here's the modified window holder / scraper. I basically had to roll the window all the way up, then install the glass. If you install it while the window is rolled down it wont go up cause the regulator pushes the glass up at an angle.  Here's a video. www.youtube.com/watch?v=WrY2vVlCNjwOne piece windows.  The finished doors. I couldn't install the are rests, well, cause the door bars are in the way. Hind sight is 20/20. I'm going to fabricate some pull straps so it'll be easier to close the doors instead of having to grab the window. Oh yeah, can't roll the windows down unless the doors are open either. LOL. They'll pretty much stay down while I'm rolling any ways.   Locking hood pins installed.  Here you can see the painted flooring.    Almost there. |
|
|
|
Post by 70fastback on Dec 20, 2010 16:25:06 GMT -5
That drop looks wayyy better...to many u-bolts? (seen the one on the floor?)
|
|
|
|
Post by V8 Super Beetle on Dec 20, 2010 18:07:58 GMT -5
I think so too! I'll get some shots of the car outside from a distance so you can see the difference. Much better.
The bolts and nuts you see are the ones I took off. They're pretty wimpy compared to the JTR stuff which is meant to handle some power. One of the reasons I got them. The ones on the floor are Auto Zone u-bolts. They're grade 8, but not near as big of a diameter as the new stuff.
|
|
|
|
Post by murphytj on Dec 20, 2010 18:56:00 GMT -5
I think so too! I'll get some shots of the car outside from a distance so you can see the difference. Much better. The bolts and nuts you see are the ones I took off. They're pretty wimpy compared to the JTR stuff which is meant to handle some power. One of the reasons I got them. The ones on the floor are Auto Zone u-bolts. They're grade 8, but not near as big of a diameter as the new stuff. Lookin'good. What are you going to do with your dash? Also, how about a video with sound on how the exhaust sounds at idle and under load. What mufflers are you running and how far back are they placed? |
|
|
|
Post by 454bug on Dec 21, 2010 0:32:05 GMT -5
Hey Matt,
The lowering blocks look great! I'm looking forward to seeing it outside so we can really see the profile.
I plan on putting the one piece windows in my project also... I'm concerned of how well they roll down since I plan to use electric motors on the windows! I've talked to the guy that we bought our fenders from (VW Innovations) and he said he has the best 1-piece window kits for use with electric windows. He sells both products... Is that who you got yours from? I didn't catch where you got yours.
EVERYTHING is looking GREAT!!
|
|
|
|
Post by V8 Super Beetle on Dec 21, 2010 9:50:53 GMT -5
Hey Tom. I eventually plan to get an aluminum dash or make one. Money is tight right now with only one income, the wife stays at home with the baby. I do have a few videos of the car at idle under load. I'll get some more soon cause I'd like to have some video without the running board trim piece rattling and a video without all my vw parts in the back of the car rattling.  www.youtube.com/watch?v=kASOEL-9g2owww.youtube.com/watch?v=EuS_oqo7zg4www.youtube.com/watch?v=dIljjUk-IZI www.youtube.com/watch?v=kASOEL-9g2owww.youtube.com/watch?v=EuS_oqo7zg4www.youtube.com/watch?v=dIljjUk-IZIHey Ray, Thanks! I'll get some shots this weekend. I would have some already but it's dark by the time I get home. I got my one piece kit from EMPI. It's a decent kit. It's the snap on kind which I understand is the best kind. There are glue in kits (scrapper rubber). The only thing I don't like is the scrapper rubber catches on the window when I roll it down. I'm trying to figure out a way so that doesn't happen. I used a little WD, which works fine, but it leaves the windows greasy looking. When you get around to installing your kit, I have a few tips you could using having just done it myself. For example, you'll need two or three extra felt channel clips to secure the felt where the vent window would go. You'll have to drill holes for the clips to snap into. Thanks again, Ray. |
|
|
|
Post by V8 Super Beetle on Dec 21, 2010 10:34:47 GMT -5
Well, after some thinking, I'm going to go down to the fabric store and buy some black felt to glue to the inside of the window scrappers. That should do the trick.
|
|
|
|
Post by 70fastback on Dec 21, 2010 12:27:08 GMT -5
Lexan FTW...put access doors in...lol...seriously that felt will do wonders if it stays dry!
|
|
|
|
Post by Mock1racer on Dec 21, 2010 16:19:46 GMT -5
TOO SWEET !!!
Lookin good dude!! Praise the lowered!!
|
|
|
|
Post by V8 Super Beetle on Dec 21, 2010 16:24:59 GMT -5
LOL, thanks!
It would stay dry 70fastback. I don't plan to drive this in the rain. Only water it will see is when it gets a bath.
|
|
|
|
Post by V8 Super Beetle on Jan 5, 2011 12:17:36 GMT -5
Not too much to report over the holidays, sadly. I had to install a new clutch set in my truck over the holiday weekend. It took me three days to pull the tranny, install the clutch, and put everything back together. While the drive shaft was out, I put in new u-joints, changed the rear diff fluid as well as the tranny fluid. Fun, fun... Also, since I've been getting closer to finishing the bug, I'm not in too much of a hurry to complete it cause then I wont have a project to work on any more. LOL. Speaking of new projects, O/T, I've been expending my knowledge on the guitar since there's little to do on the bug. I would consider myself an advanced / semi pro guitar player, but there's always more to learn even after 15 years of playing. I did get the bug out though and took a couple shots with the new stance. Also, I used the bug for parts hauling when I was working on the truck. I took it to Autozone down the street and also took it to get lunch for me and my wife another day. I must say, the first trip out of the neighborhood gave me a little bit of wood. LOL   Plans over the next month are to wiring the lighting, install the carpet, buy and install an aluminum racing dash, and extend the exhaust out the original exhaust holes. It'll pretty much be finished after that. All that's left to do is drive! |
|
|
|
Post by Mock1racer on Jan 5, 2011 12:20:43 GMT -5
;D ;D ;D ;D
Great Job Matt!!
|
|
|
|
Post by V8 Super Beetle on Jan 19, 2011 15:07:13 GMT -5
Hey guys. I hope everyone's projects are going well!
I just wanted to update everyone. I'm taking a slight breather this first part of the month and will start finishing up the bug again soon. I've just been spending time with the family and giving my wife some much needed time to get her home business up and running, which means I've had baby daddy duty (which I enjoy, BTW) in the evenings and the weekends to give her time and a break.
I still need to install my wiring kit, carpet, and an aluminum dash. Other than that, the car will be finished, for the most part. I'm not sure these things will ever be done.
|
|
|
|
Post by V8 Super Beetle on Feb 2, 2011 14:34:30 GMT -5
Hey guys, Just poppin' in to update everyone. While I'm taking me a breather from the project I've started an O/T project. The only reason this is able to happen is because I'm selling my current gigging amp to fund the project. I'm build a 50's era Fender Tweed Deluxe guitar tube amplifier from scratch. This is my first amp build and I'm doing it from scratch. I will be hand building my own cabinet and hand selecting each part that goes into this build. This amp will become my primary gigging amp. I play 2-3 a times month in a cover band and I feel this amp will fit the bill. My tools and budget is fairly limited so I'll be building the cabinet with hand tools and will be borrowing a couple tools here and there from buddies / work to complete this project. Here is the start of the cabinet. I'm using solid pine for the cab and birch ply for the baffle boards.   Here's how the finished product will look.  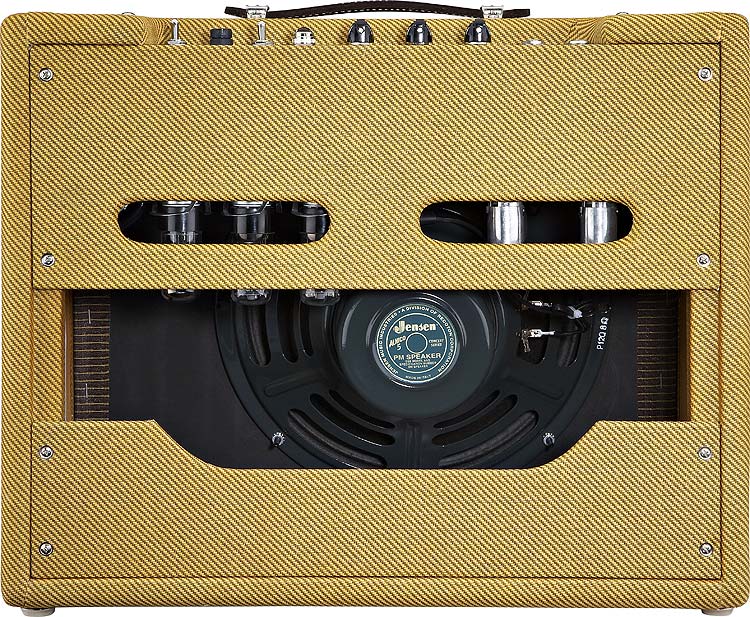 I drafted out all the cuts onto the wood and then cut the pieces on the table saw here at work. I'm currently working on hand cutting the dovetail joints. It's going okay. The joints fit together tightly and make a strong joint, but it's not as pretty as dovetail joints done by someone more experienced or by machine tools. That's okay though. It'll be my creation and I'm enjoying the build so far. I've built a few car sub cabs before and I was always best at covering the cab with carpet. So the end results should come out looking nice. :thumbsup: I'll definitely be taking my time with this one. :thumbsup: I'm still mauling over certain mods for the layout of the circuitry and getting advice from more experience people. Whatever route I choose to go, it should be a pretty versatile amp for my needs. |
|