
Post by zbhover on Nov 23, 2010 23:10:25 GMT -5
Hello everyone I just thought I’d give you all a quick update on the V8 1969 convertible beetle project. Lately I haven’t had a lot of time to work in it because of working lots of hours, and also putting up a picket fence around our house and staining it, etc…….
But anyways I got the front end of the s10 chassis reassembled and rolling again, figured out where I’m going with the stance of the car and will hopefully be making a new transmission cross member soon.
Below are a few pictures, but I have almost 30 new pictures in the chassis section of the V8 Beetle Resource website at www.v8beetleresource.com

Here I started to reassemble the front end of the s10 chassis on the v8 bug. So far the new tubular upper control arms are bolted on. I also replaced all of the bolts, nuts and washers while I did the rebuild of the front end.

Here is a closer look at one of the tubular upper control arms, and the upper ball joint. I ended up getting a real good deal on ball joints and wheel bearings, they are all napa gold series and I picked them up off of ebay all new in the boxes and plastic for about the price of just one ball joint.

Now the lower control arms are bolted in. I ended up having to get a longer bolt for the rear bushings because the added thickness of the hurculiner made them just a tad too short. I also used stock style rubber moog bushings in the lower control arms.

Here I have the 2" drop spindles on the upper ball joints and also the steering box mounted. I reused the old steering box because it still seemed to be nice and tight, and also because I didn't have the money for a new steering box.

Here are the new Moog coil springs painted with master series silver rust proofing primer and the Moog polyurethane coil spring isolators. I ended up upgrading from the 2.8l springs to the 4.6l spings. I figured with the extra weight of the 350 up front it would help out............... But I think it will come back to bit me in the butt latter........ I think with moving the engine back 5” or 6” from the normal s10 v8 conversion and not having any body wait up front made these new stiffer springs a bit too much. I put 2” drop spindles on the front end but with these springs the bare chassis sits only ½” lower than the stock bare chassis with 2.8l springs and stock spindles. I’m thinking I’m going to try to cut 1/2 to ¾ of a coil off of the springs and see what it does for me. I figure I might as well try since I already have them, if it makes the front end too bouncy I’ll have to get different springs latter………….

Here I have the coil springs in and the lower control arms and ball joints connected to the 2" s10 drop spindles.

Just a closer look at the upper and lower control arms, 2" s10 drop spindles and also the moog coil springs all installed

Here I have the center link (drag link) tie rod ends, idler arm etc installed, all new Mood parts, I found the best prices for these from amazon and rockauto.

Next I put on the brake backing (splash) plates and then I forgot to take a bunch of pictures. Probably because I was covered in wheel bearing grease LOL. But I packed the wheel bearings and installed them and the seals. I then put the rotors on which were life time warranty Wagners from O Rilies. Then it put on the spindle nut, cotter pin, and grease cover, etc... I also installed the remained calipers and Wagner ceramic pads. I went with lifetime warranty parts from O Rilies so I can easily exchange them when they wear out. I could have saved a couple bucks buying them from Rockauto, but I figured the local warranty would be worth it.

Here is a quick look at the front end after its almost all back together, I just needed to put on the ZQ8 (s10 extreme) front sway bar, bushings, and end links.

Then the engine finally went back in place and I rolled it outside to get some better pictures. Here I also have the ZQ8 sway bar and polyurethane bushings installed, but not the end links yet. I picked up the sway bars for both the front and back off of ebay pretty cheap.

Here I started eye balling the car to figure out the stance so I can get the engine leveled the way it should be, make a transmission cross member, etc. I think I'm going to go with 29" tall tires in the back and around 24.5" tall tires in the front. That way I get a nice rake to the car, I'm thinking I'll go with some 255 70 r15 tires in the back and 205 60 r15 or 195 55 r15 in the front. I'm going to try to find some cheap used tires to mock it up for the time being.
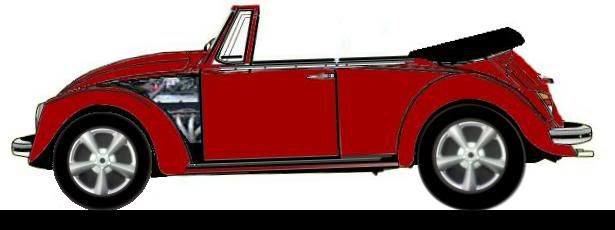
And finally here is a quick guest-a-ment of what it will look like with those tires and the rake. As good as I can do with paint and not spending hours drawing up a 3d model………. LOL
But anyways I got the front end of the s10 chassis reassembled and rolling again, figured out where I’m going with the stance of the car and will hopefully be making a new transmission cross member soon.
Below are a few pictures, but I have almost 30 new pictures in the chassis section of the V8 Beetle Resource website at www.v8beetleresource.com
Here I started to reassemble the front end of the s10 chassis on the v8 bug. So far the new tubular upper control arms are bolted on. I also replaced all of the bolts, nuts and washers while I did the rebuild of the front end.
Here is a closer look at one of the tubular upper control arms, and the upper ball joint. I ended up getting a real good deal on ball joints and wheel bearings, they are all napa gold series and I picked them up off of ebay all new in the boxes and plastic for about the price of just one ball joint.
Now the lower control arms are bolted in. I ended up having to get a longer bolt for the rear bushings because the added thickness of the hurculiner made them just a tad too short. I also used stock style rubber moog bushings in the lower control arms.
Here I have the 2" drop spindles on the upper ball joints and also the steering box mounted. I reused the old steering box because it still seemed to be nice and tight, and also because I didn't have the money for a new steering box.
Here are the new Moog coil springs painted with master series silver rust proofing primer and the Moog polyurethane coil spring isolators. I ended up upgrading from the 2.8l springs to the 4.6l spings. I figured with the extra weight of the 350 up front it would help out............... But I think it will come back to bit me in the butt latter........ I think with moving the engine back 5” or 6” from the normal s10 v8 conversion and not having any body wait up front made these new stiffer springs a bit too much. I put 2” drop spindles on the front end but with these springs the bare chassis sits only ½” lower than the stock bare chassis with 2.8l springs and stock spindles. I’m thinking I’m going to try to cut 1/2 to ¾ of a coil off of the springs and see what it does for me. I figure I might as well try since I already have them, if it makes the front end too bouncy I’ll have to get different springs latter………….
Here I have the coil springs in and the lower control arms and ball joints connected to the 2" s10 drop spindles.
Just a closer look at the upper and lower control arms, 2" s10 drop spindles and also the moog coil springs all installed
Here I have the center link (drag link) tie rod ends, idler arm etc installed, all new Mood parts, I found the best prices for these from amazon and rockauto.
Next I put on the brake backing (splash) plates and then I forgot to take a bunch of pictures. Probably because I was covered in wheel bearing grease LOL. But I packed the wheel bearings and installed them and the seals. I then put the rotors on which were life time warranty Wagners from O Rilies. Then it put on the spindle nut, cotter pin, and grease cover, etc... I also installed the remained calipers and Wagner ceramic pads. I went with lifetime warranty parts from O Rilies so I can easily exchange them when they wear out. I could have saved a couple bucks buying them from Rockauto, but I figured the local warranty would be worth it.
Here is a quick look at the front end after its almost all back together, I just needed to put on the ZQ8 (s10 extreme) front sway bar, bushings, and end links.
Then the engine finally went back in place and I rolled it outside to get some better pictures. Here I also have the ZQ8 sway bar and polyurethane bushings installed, but not the end links yet. I picked up the sway bars for both the front and back off of ebay pretty cheap.
Here I started eye balling the car to figure out the stance so I can get the engine leveled the way it should be, make a transmission cross member, etc. I think I'm going to go with 29" tall tires in the back and around 24.5" tall tires in the front. That way I get a nice rake to the car, I'm thinking I'll go with some 255 70 r15 tires in the back and 205 60 r15 or 195 55 r15 in the front. I'm going to try to find some cheap used tires to mock it up for the time being.
And finally here is a quick guest-a-ment of what it will look like with those tires and the rake. As good as I can do with paint and not spending hours drawing up a 3d model………. LOL


 )
)


