|
|
Post by 454bug on Mar 31, 2008 1:02:56 GMT -5
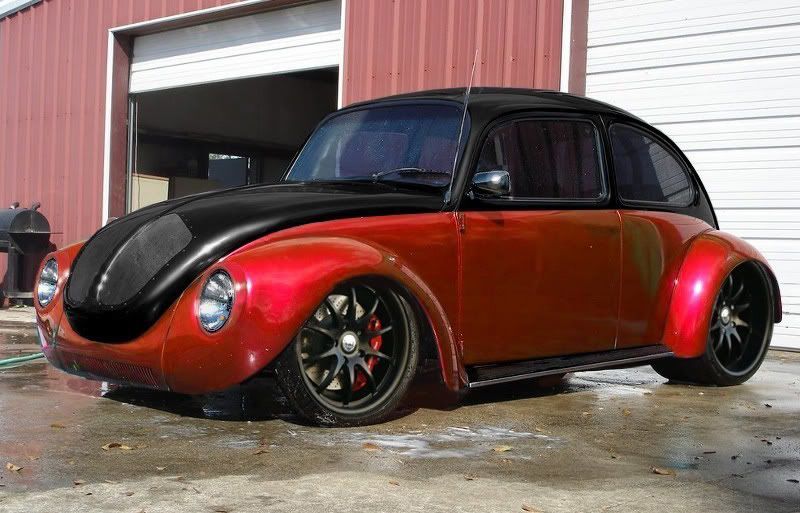
a couple of pictures of the rest of the interior... during this rebuild I am going back with a couple of comfortable, leather racing seats instead of the bench seat. Under the deck is the battery box and a SMALL amount of storage area!!! 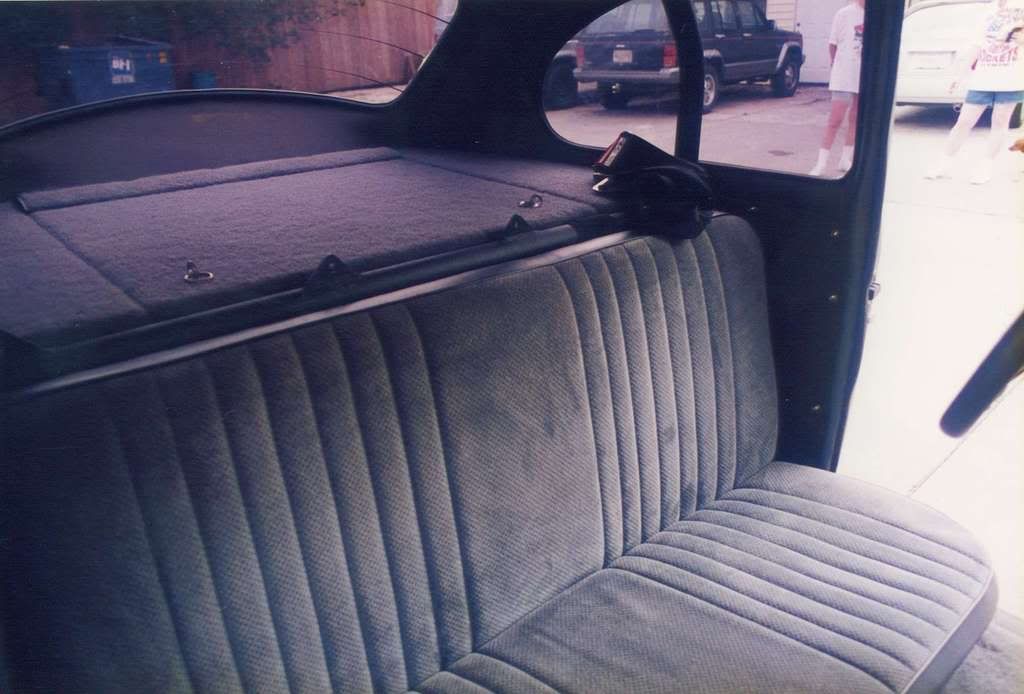 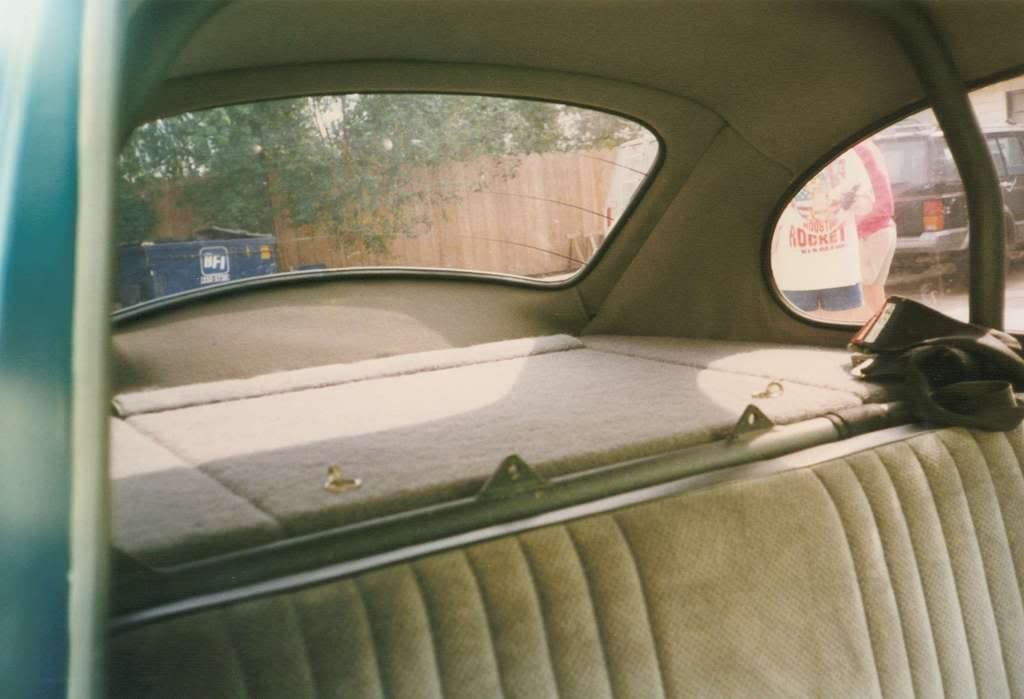 |
|
|
|
Post by hellraiser on Mar 31, 2008 2:47:12 GMT -5
wow thats a nice bug.
|
|
Roadrunna
Full Member
 Pissin off the purists
Posts: 183
|
Post by Roadrunna on Mar 31, 2008 3:37:15 GMT -5
Cool bug. I love that bench seat  |
|
|
|
Post by V8 Super Beetle on Mar 31, 2008 9:25:18 GMT -5
Looks good! Thanks for the interior pics. I agree, I love the newer look better with the digital gauges. The carpet all over the place and the gauge box just didn't look as nice as the custom dash. I like the bench seat idea too. Can't wait to see pics with all the upgrades installed.
|
|
|
|
Post by 454bug on Apr 1, 2008 18:33:44 GMT -5
A number of guys have been asking questions about which way to go with the frame to use in their builds. Some of the guys have used S-10 or Blazer type frames and others have built one-off custom frames. Both have their +'s and -'s. The S-10/Blazer frames will be inexpensive but will be heavy. Going the second route will have a number of benefits but will also have a number of pitfalls for most people. Depending on the individual's experience, expertise, and available tooling it could be harder or not. On the positive side, the custom chassis would be more purpose-built and definitely lighter (a truck frame never touted being light). I was lucky enough to have a custom frame to start with. I am just updating it with newer and better technology (disc brakes, independent front suspension, rack-and-pinion steering, aluminum double-adjustable coilover shocks, and modified 4-link rear suspension.)
|
|
|
|
Post by 454bug on Apr 1, 2008 18:50:26 GMT -5
I have seen on multiple sites where individuals are interested in building a V8 bug but are unsure how to get started. The handful of guys that built their own custom chassis have spent a TON of time mocking their frames up and depending on their expertise and tooling might end up with a nice end product or not. It is usually more expensive also. The positive notes as stated before are light weight and usually higher-tech components.
A few months ago I stumbled across a website that might be of interest to a number of guys wanting to have a platform to work from. After working out the bugs of a chassis and then just duplicating the effort has a LOT of appeal to it.
Go check out this site, "prostreetbug.com". They have really got a cool deal with their custom bug frames... You can buy whatever fits your particular expertise, tooling, and time constraints.
The options are as follows:
"Blueprint Package" - Drawings for the guy that has the time, money, tooling, and expertise to build everything themselves. (Price - $125 + $5 shipping)
Stage I chassis kit - All frame pieces are precision cut and ready for the capable fabricator to "jig" them up and construct everything themselves. (Price - $1,075 + $50 crating + shipping)
Stage II chassis kit - This stage has all the precision cut material "jigged" up and welded. The front and rear suspensions will be the responsibility of the individuals. (Price - $1,775 + $125 crating + shipping)
Stage III chassis kit - This stage will include the front suspension, rack-and-pinion steering, front disc brakes, front springs and shocks, rear suspension (minus housing), rear coilover shocks, etc. (Price - $4,395 + $125 crating + shipping)
I tried to forward the basics of each listing. Go check out the site for more particulars.
Enjoy and happy building!!!
|
|
|
|
Post by 454bug on Apr 1, 2008 19:24:11 GMT -5
Also, another topic of discussion that I wanted to mention was how to do a custom wire job for one of these vehicles.
I researched this when I was revamping my car. As previously stated, EVERYTHING on my car was "old-school" technology and the wiring system was NO exception!!
When I purchased the car it actually had the old "glass" fuses and fuse block!
|
|
|
|
Post by 454bug on Apr 1, 2008 20:12:27 GMT -5
Everyone has heard of "Painless Wiring" and their product line. I checked them out but most of their products have their fuse block with all their wiring sticking out the back of the block... This can be pretty frustrating in laying it out on a true "custom" car. After talking to a number of guys that had wired their street rods I felt there was something that was not as expensive and more user friendly when building a true "custom" ride. The distinction is this... If you are "replacing" a wiring harness in a particular vehicle then this product might be okay. That is because each wire has a pre-determined color and length to match the factory layout... There really is no "factory layout" when working on one of these custom machines! This product, for example, is about $500.00 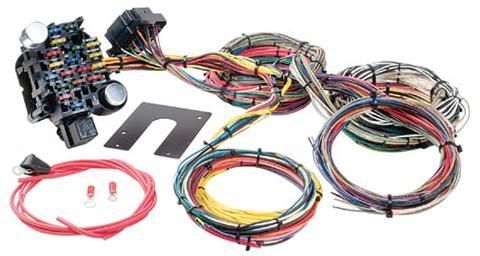 |
|
|
|
Post by 454bug on Apr 1, 2008 20:21:55 GMT -5
I found a site called, "affordablestreetrods.com". The have a reasonably priced product and all wires "terminate" at the fuse block. This worked really well. I ran the wires to everything, lights, ignition, horn, blinkers, etc. and then just terminated them at the fuse block. It was THAT easy!!! EVERYTHING is labeled on the fuse block and the instructions are very basic and straight forward. The relays for the horn, blinkers, and flashers are built on to the panel. Best of all the "Power Panel" was only $140.00 and all I had to buy after that was the wire. Check it out... I think you will like what you see!  |
|
|
|
Post by V8 Super Beetle on Apr 2, 2008 9:26:00 GMT -5
A number of guys have been asking questions about which way to go with the frame to use in their builds. Some of the guys have used S-10 or Blazer type frames and others have built one-off custom frames. Both have their +'s and -'s. The S-10/Blazer frames will be inexpensive but will be heavy. Going the second route will have a number of benefits but will also have a number of pitfalls for most people. Depending on the individual's experience, expertise, and available tooling it could be harder or not. On the positive side, the custom chassis would be more purpose-built and definitely lighter (a truck frame never touted being light). I was lucky enough to have a custom frame to start with. I am just updating it with newer and better technology (disc brakes, independent front suspension, rack-and-pinion steering, aluminum double-adjustable coilover shocks, and modified 4-link rear suspension. They do both have there pros and cons. From my own personal experience so far, this is what I've found out about going with the S10 frame. S-10 Blazer FramePros:•Inexpensive (I paid $150 for a complete rolling chassis). •Easy to find replacement parts. •Strong frame (I believe. Mine measures 2"x6" and the frame is boxed all the way back until the frame arches up for the rear. •Minimal amount of welding has to be done to get the needed wheelbase. •You can get away with less tools. Cons:•Heavier. •You have to cut out a lot of the bug body away to make it fit on top of the frame (this was easy, but it leaves the body weaker and you have to remove a good section of the heater channels, from my experience). S10 frames sit kinda high. If you're looking for a lower riding bug you'll have to lower the body down on the frame quite a bit or purchase a lowering kit. •Stock leaf springs wont fit under the body. You'll have to get short leaf springs or a 4 link / ladder bar w/ coil overs. I was thinking about making a custom tube chassis for mine but my budget for this project is somewhere between 2K-3K. I found that the price of steel was pretty steep these days as well as the cost of Mustang II suspension parts. I'd say here's the pros and cons of building a custom tube chassis out of 2"x3" or 2"x4" tubing. Pros:•There's more flexibility and options building a custom frame. •Frame will be lighter. •Can make the frame stronger using chromoly steel. •Many suspension setups to choose from. •Easier to keep the stock look inside and out. •Plans available (prostreetbug.com) Cons:•Steel and IFS / rear coil overs are more expensive, not for the budget builder. •High skill level required. •Many tools required. Well, this is my take on the matter. There are a couple guys here that have built their bugs using the prostreetbug plans. My next V8 bug build will be done using a similar design. For now budget is the biggest concern. Also, I've found that you can combine the two building options above. This bug chassis uses a S10 front clip and 2"x4" tubing for the rest of the chassis. 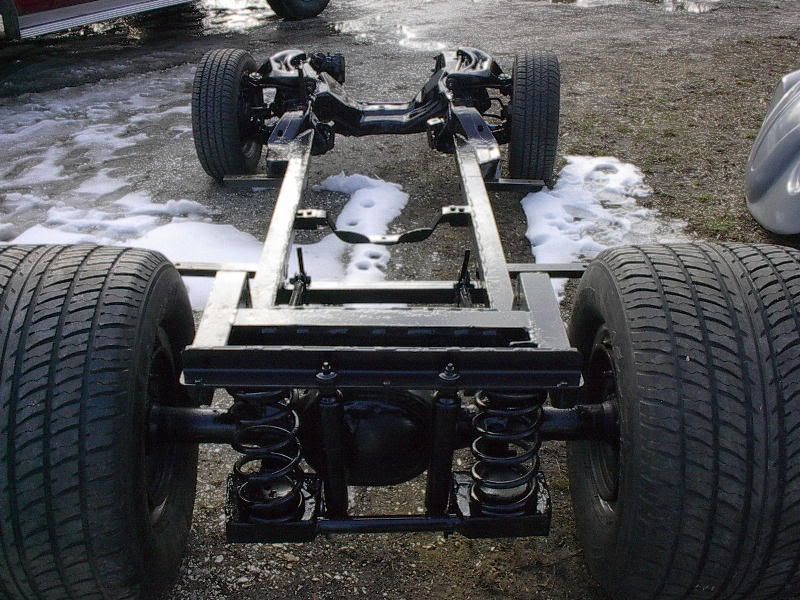 |
|
|
|
Post by V8 Super Beetle on Apr 2, 2008 9:33:00 GMT -5
Also, another topic of discussion that I wanted to mention was how to do a custom wire job for one of these vehicles. I researched this when I was revamping my car. As previously stated, EVERYTHING on my car was "old-school" technology and the wiring system was NO exception!! When I purchased the car it actually had the old "glass" fuses and fuse block! There are some complete "painless" wiring system on eGay (eBay) that run for about $175 + $15 or so for shipping. These are complete "Hot Rod" wiring kits, includes wire and fuse box, that are color coded and have everything you need to make your vehicle street legal. See this sellers store for some inexpensive kits. myworld.ebay.com/ebaymotors/easy2wire/This kit is a good example. EZ2Wire 22 Circuit Wiring Harness painless to install
Universal fit for all Street Rods & Hot Rods SAVE BIG !
US $169.99

|
|
|
|
Post by V8 Super Beetle on Apr 2, 2008 9:54:06 GMT -5
I found a site called, "affordablestreetrods.com". The have a reasonably priced product and all wires "terminate" at the fuse block. This worked really well. I ran the wires to everything, lights, ignition, horn, blinkers, etc. and then just terminated them at the fuse block. It was THAT easy!!! EVERYTHING is labeled on the fuse block and the instructions are very basic and straight forward. The relays for the horn, blinkers, and flashers are built on to the panel. Best of all the "Power Panel" was only $140.00 and all I had to buy after that was the wire. Check it out... I think you will like what you see! Thanks for all the good info. I think maybe a thread should be started as a resource for people to easily find restore parts for their bug bodies (such as trim, rubber, glass, fenders, interior, etc., jbugs.com) online stores to purchase V8 parts (jegs, summitracing, ebay), and ready built suspension and cages (IFS, V8 motor mounts for S10 chassis, etc.). An easily accessible / to find thread, perhaps on the main forum page. I wonder if this info would be good just to post in the "Want your very own V8 Volkswagen? - Let us build you one" Thread? |
|
|
|
Post by racerman51 on Apr 2, 2008 20:36:55 GMT -5
since everything else was new on the brake system I decided to buy all new master cylinders (one for the front and one for the rear) and a new pedal assembly as well. It was the exact system that was already on the car but about 20 years newer... 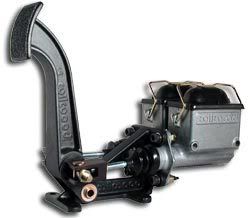 V-8 Super Beetle,this is the way that might be the easiest way to go for you for the master cylinder assembly....once you get the floor figgered out and such,all you have to do is take a piece of plate and cut it out to fit the assembly then figure out where you want it(to fit where your feet go and where you're comfortable and such) and then weld it to the frame..and fit the floor around where it comes out.. SKAR,where ever you are...as for your situation,what I might suggest is to try and use the stock Mustang master cylinder in the stock position and the stock brake pedal...I'm not sure how Ford does their master cylinder mounting,but GM has a stamped steel mount that ties the master,the pedal and the steering column together...when my buddy built his stock car,he took this mount and used it for mounting the master and the pedal and he didn't have any problems with it...a quick aside here,when this car was built,it was done so without the stock firewall in it to take weight out of the car,so he had to do it this way..it was the easiest way to do so.. |
|
|
|
Post by V8 Super Beetle on Apr 2, 2008 21:24:26 GMT -5
I've considered this option, which is popular one. I've also considered just cutting out the firewall and floor from an S10 taking the brake booster, master cylinder, and pedal assembly along with it, but point well taken.
|
|
|
|
Post by 454bug on Apr 2, 2008 22:08:06 GMT -5
The brake system you see pictured above does not have to be welded in place. If you look at the picture closely you will see where 4 bolts mount the brake pedal bracket to your floor and 2 bolts to the firewall. The two master cylinders are then attached to the assembly and not to the car. Very clean and simple. It has a "balance" bar built into the assembly to put more or less bias to the front or rear master cylinder. It is either adjusted with an allen wrench at the pedal of the racing guys have a cable that makes it adjustable from their dash "on the fly".
|
|